Each tutorial on this site follows a braid pattern, which uses any of the following 4 different types of knots:
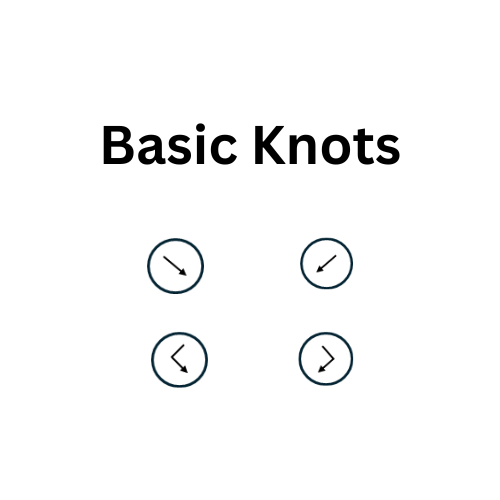
This post explains how to make each of the basic knots with video tutorials.
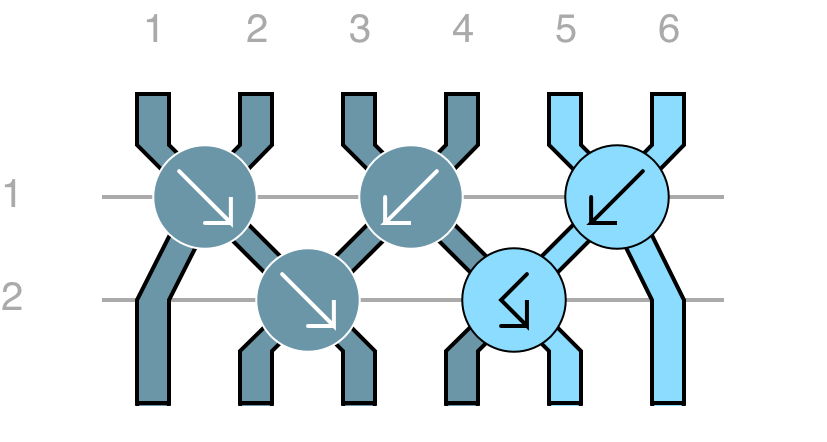
I will use the pattern below as an example to explain how to read and follow through it.
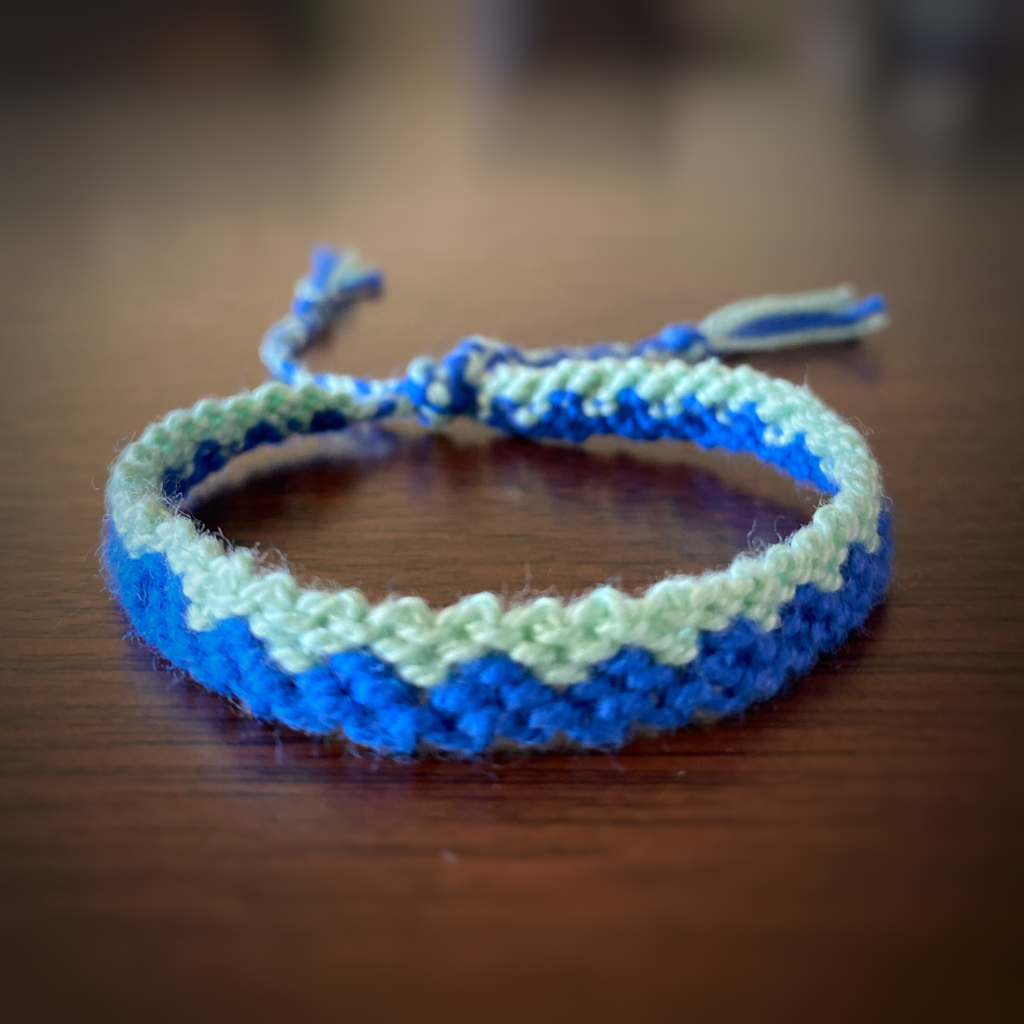
This is the finished whistlet by following the pattern above: This post demonstrates how to make it in details with videos.
Overview
From the pattern, you can get the following information: number of cords used, number of different colours used, and number of rows needed to complete one full design.
For instance, this pattern uses:
- 6 cords, as indicated on the first row numbed from 1-6
- 2 different colours: cord 1-4 use one colour, and cord 5 & 6 use another colour.
- Number 1 & 2 on the left side indicates the first and the second row of braiding. Then repeat the patterns of row 1 and 2 for the rest of the rows till you reach the desired length.
Understand The Pattern
Starting from left to right, work with 2 cords at a time. Tie 2 knots on these 2 cords. The kind of knots tied are indicated by the symbol on the cords in the pattern diagram.
For example:

The first row, the first 2 cords: left cord covers right cord, make “4” knot twice, straighten the cords. Then move on to the middle 2 cords.

The middle 2 cords: right cord covers left cord, make reverse “4” knot twice, straighten the cords. Then move on to the last 2 cords.
The last 2 cords: right cord covers left cord, make reverse “4” knot twice, straighten the cords. Then move on to the 2nd row.

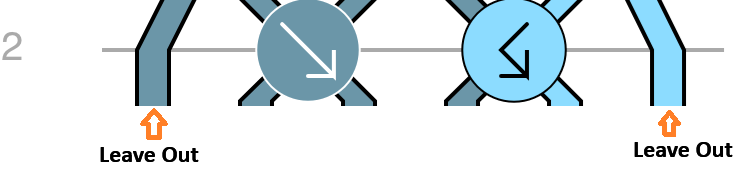
The second row, move aside the first cord and the last cord. Take the next 2 cords (2nd & 3rd cords), left cord covers right cord, make “4” knot twice, straighten the cords.
Next, take the 4th and 5th cords, right cord covers left cord, make a reverse “4” knot, then a “4” knot, straighten the cords.

Last, repeat row 1 and 2 till the desired length is reached.